Fireflies         

Jun 19, 2013

CHALK One Up For Summer!


Summer is in full swing and at my house, that means lots of outdoor time.  One of our favorite activities is drawing with sidewalk chalk.  For this month's post, my family decided to make their own.  

A friend had sent me a link to this recipe at Playful Learning's blog.  We more or less used the same quantities.  Here is a list of s supplies you will need for this project:
  • cardboard wrapping paper tube
  • wax paper
  • masking tape
  • tempera paint
  • plaster of paris
  • scissors
  • blade (to cute the cardboard tubing into segments)
  • mixing bowls (we used plastic cups)
  • paint stirrers (we used disposable chopsticks)


First, have your honey or some other adult, cut the tube into even sections with your blade.


Cut some pieces of wax paper.


Roll up the wax paper pieces and insert into the tubing.  You want to have a nice barrier between the cardboard and the chalk mixture.


Secure the wax paper with masking tape.  Cut additional wax paper to cover the bottom of the tube and secure that as well.


Now, the fun part.


You are going to mix 1/2 cup of water and 2 tablespoons of paint.  


We also used an assembly line of sorts to keep things organized.


We did 6 colors so needed 6 mixing container.  We found it easier to put the water and paint in the cup (bowl) first, and then mix in the plaster of paris.
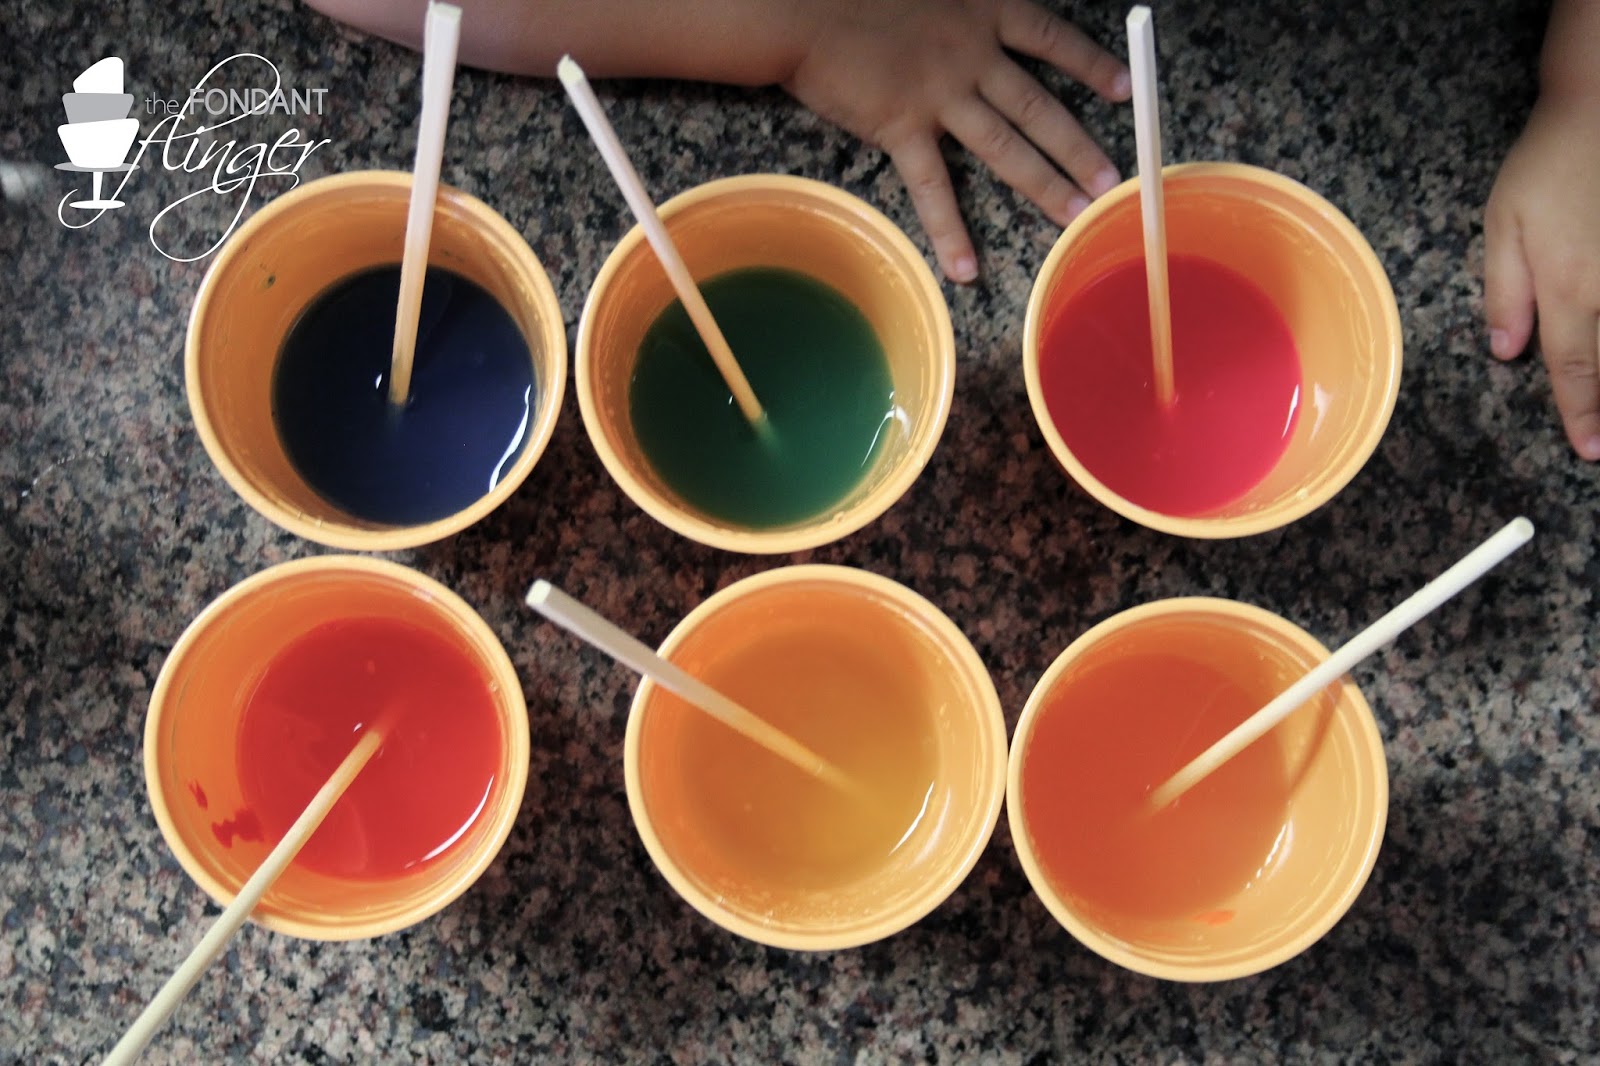

You will need to mix in 3/4 cup of plaster of paris.


Mix well!  After the colors are mixed, pour each chalk mixture into a zip-top sandwich bag.


To keep our tubes from falling over, we taped them all together in a big clump.


 Clip a bottom corner off the bag and squeeze colored chalk into the prepared tubes.


Let dry at least 24 hours.  Some of our colors are still not completely dry and its been about 36 hours but this is probably due to the humidity.


After the chalk has dried completely, tear off the cardboard tubing and wax paper and there you have it.  Your very own sidewalk chalk!


Author: Rachel Skvaril
Sugar Artist

Labels: ,

May 18, 2013

A Legacy Moment: Build a birdhouse!

NatureSkills.com
This weekend is a great time to build your own birdhouse for the backyard.  First read this month's Chasing Fireflies book choice, Riki's Birdhouse and then gather the supplies and create your own backyard home for your feathered friends.


Birdhouse Plan from Riki's Birdhouse
Here is Mary Byrne Kline's review for Riki's Birdhouse in case you missed it.   REVIEW
I've just finished reading it to my 3 year old...for the 22nd time.  I guess it's a hit.

And if you missed our heart shaped bird feeder in March, here it is!  POST

Build-it-Yourself

from L & L Design Group 


Don't forget to send us a picture of your finished birdhouse; your legacy moment!

Check out the Nature Skills website for more information on birdhouses!

Labels: ,

Mar 20, 2013

Family Cardboard Creations


Working with Cardboard Tutorial
Link:  ikatbag

Begin with the tutorial above from I Kat Bag that covers everything you ever wanted to know about working with cardboard - all types of cardboard.  Before reading this post, I honestly had never thought about all of the different options in cardboard.    After watching this tutorial, you will be inspired by the following posts to make some wonderfully innovative creations - all from a box.  And don't miss the must-have cardboard tool kit at the end of this post.   


Idea Blog #1

Get Crafty with Boxes
Link: Red Ted Art Blog


Inspiration Blog #2
7 Tips for Working With Cardboard


Check out this great tool kit for working with cardboard!
MakeDo Kit's Product Description:
"
So long, empty cereal boxes, plastic bottles and old CDs piling up in the trash. Hello, magical playhouse, flying car and anything else your creative mind can imagine. With Makedo FreePlay Kit for One, you can recycle common household items into limitless creations using the kit’s fasteners, connectors and plastic safe-saw. The parts are all reusable so when you’re done with one creation, just pull it apart and make another one. Whatever you decide to make, you’ll exercise creativity and coordination skills while turning trash into treasure and learning about sustainability."
Purchase by clicking on the image below:


Labels: , ,

Mar 13, 2013

A Family Drive-In Movie Night


Jack Larmore


After seeing Nate & Anita Larmore's FB post about their Drive-in Movie night, I asked Anita to share the details along with her pictures.   I know her post will spark your imagination and inspire you to create your own drive-in movie night for your family, playgroup, school group, or church's children's ministry.   Welcome our guest blogger, Anita Larmore & read on - you are in for a treat!!!  
Deni Corbett


Create your very own Drive-in Movie   
Any 21st century mom living in America today has boxes.  It is the day we live in… wireless internet, free shipping, and ‘no kids anywhere’ kind of shopping!


Our project today involves boxes.  Big ones!  CHILD-SIZED ONES, as a matter of fact!  If you are like me, boxes abound.  I can’t wait for recycle day just to get rid of them!  Here in CA, they’re in the garage and for all you lucky folks with basements and attics, you have them there!  And if you can’t find one big enough, there’s always your local grocery store. 
It is time to hold a drive-in movie night for your kiddos.  One they won’t soon forget.  Send out invitations. The sky is the limit on what you can create.  And soon your living room or your church or even your deck on a warm summer night, will be full of cars, giggling children and popcorn galore.  

Once you have found a box large enough for your child to sit comfortably, here is how you assemble it so that your child can see out of the top.
  1. Cut off three of your box’s lid flaps, leaving the fourth flap to become the windshield of the car.
  2. Use the flaps that you cut off to shape two triangular pieces that will secure the sides of your windshield into the position you like best.
  3. Use duct tape to secure the box into shape (duct tape is also easier to paint over than standard packing tape).
  4. Prepare a well-ventilated outdoor area to spray paint your box.  Apply several even coats until the car looks right to you.  If you run out of time like we did one year, construction paper will work in a pinch!
    Once the painting is done, here are some ideas for those extras that will make your car pop!

  5. Wheels
    :  You can attach wheels made from paper plates or cut out four large circles from construction paper.  Draw rim details onto your wheels or glue a colored printout of wheel rims from the internet.
Windshield:  Glue a windshield cut from construction paper to the front of the angled flap on top of your car.
Headlights/taillights
:  Draw lights or glue colored printouts of headlights and taillights to the front and back of your car.  You can even have working headlights by cutting out the center of your headlights and inserting flashlights that can be turned on at your event. 


Katie Larmore
Hood emblem:  Draw a hood ornament or glue a colored printout to the front of your car.

License plates
:  Draw a license plate or glue a colored printout to the front/back of your car.

Decals and décor
:  Your child will have fun with stickers, markers, and decals to further decorate the exterior of the car. Many details can be drawn with thick-point permanent marker or printed from photos found on the internet for more realistic detail Dads will care more about the realism than you probably will.  When my husband was involved in the finishing part of this project, it was all about replicating his favorite car.  Googling key words like “wheel rim” or “hood emblems,” he meticulously created his dream car (since he’ll never own it).  Perhaps the purple was not his top choice, but it was for his little girl. 


Steering wheel
:  Using a pencil skewered through a paper plate decorated for the part, you can add a steering wheel. 

Dashboard
: Cut out and decorate pieces or print out color decals for dash instruments such as Speedometer, Tachometer, Radio, etc.

Mandy Larmore
When you are done, all that’s left is throwing in a pillow or a stool, dimming those lights, popping in that movie, filling up those popcorn bowls, and you have added yet another “Once upon a time” memory in your child’s life.  

Anita Larmore
Fireflies Guest Blogger


Labels: ,

Feb 27, 2013

Fireflies Crafts: HEART bird feeders


A Fireflies' Family Activity - Gather the materials and together create these adorable feeders for the birds in your backyards.  They are easy to make and mold into endless possible shapes.  Consider using Jello molds, cookie cutters, or no forms at all to create these bird feeders.  We used a heart shaped cookie cutter because we tried out this recipe before Valentine's Day to give as gifts.

The following makes 5 - 6 bird feeders depending on the thickness of each shape.

Materials Needed
  • 3 cups of bird seed
  • 1 packet of plain gelatin
  • 3 T corn syrup
  • 3/4 c of flour
  • 1/2 c water
  • Wax paper
  • Shape maker: cookie cutters, jello molds etc.
  • Cookie sheets
  • String
  • Pencil or straw for creating the "hanging hole"
Directions
In a large bowl, thoroughly mix together the water, flour, corn syrup, and gelatin.
Add the bird seed and mix until evenly coated.   (I wanted to buy the smallest amount of bird seed available which was parakeet bird seed.   I really loved it using it because of all the colors and shapes of seeds.)
Cover a cookie sheet with wax paper, fill your desired forms with the seed mixture - packing firmly.  If the seed is not pressed together firmly, it will fall apart.
Place a hole in the center of your shape using a straw or pencil.   Make sure the hole goes all the way through.  (Placing it closer to the middle allows for enough strength to hold the string.)  When your shapes are complete, allow to air dry for 24 - 48 hours - turning every once in awhile.

Run a string through your hole, hang your bird feeders, and enjoy!    
Hang where children can observe many fine feathered visitors
coming to dine on their creations.

A Fireflies' Gratitude & Service idea:
Why not make a heart shaped bird feeder for Grandma and deliver with an "I love you" note - even if it is after Valentine's Day?   Every day is a great day to say "I love you"!   


CLICK HERE for more creative and natural bird feeders ideas.

Labels: ,