Fireflies         

Feb 20, 2013

Let's Draw a Dog! ~ Masterpiece Response

Most children love animals and man's best friend is the perfect animal for little ones to practice creating for our February Fireflies theme: Hearts & Love!   

Here is another little dog also by Manet 


"Head of Dog - Bob."
"Head of Dog - Bob"
Artist:  Manet

Manet was a painter during the Impressionistic period in France.  His friend was Monet.  A lot of people get Monet and Manet confused.  Claude Monet was known the father of Impressionism that began with his painting "Impression, Sunrise."  

Manet painted during that time period and was inspired by the Impressionists, but his style wasn't complete Impressionistic.


Let's draw a simple dog - step by step!  
You will need a box of oil pastels, a piece of white paper and a willing heart!
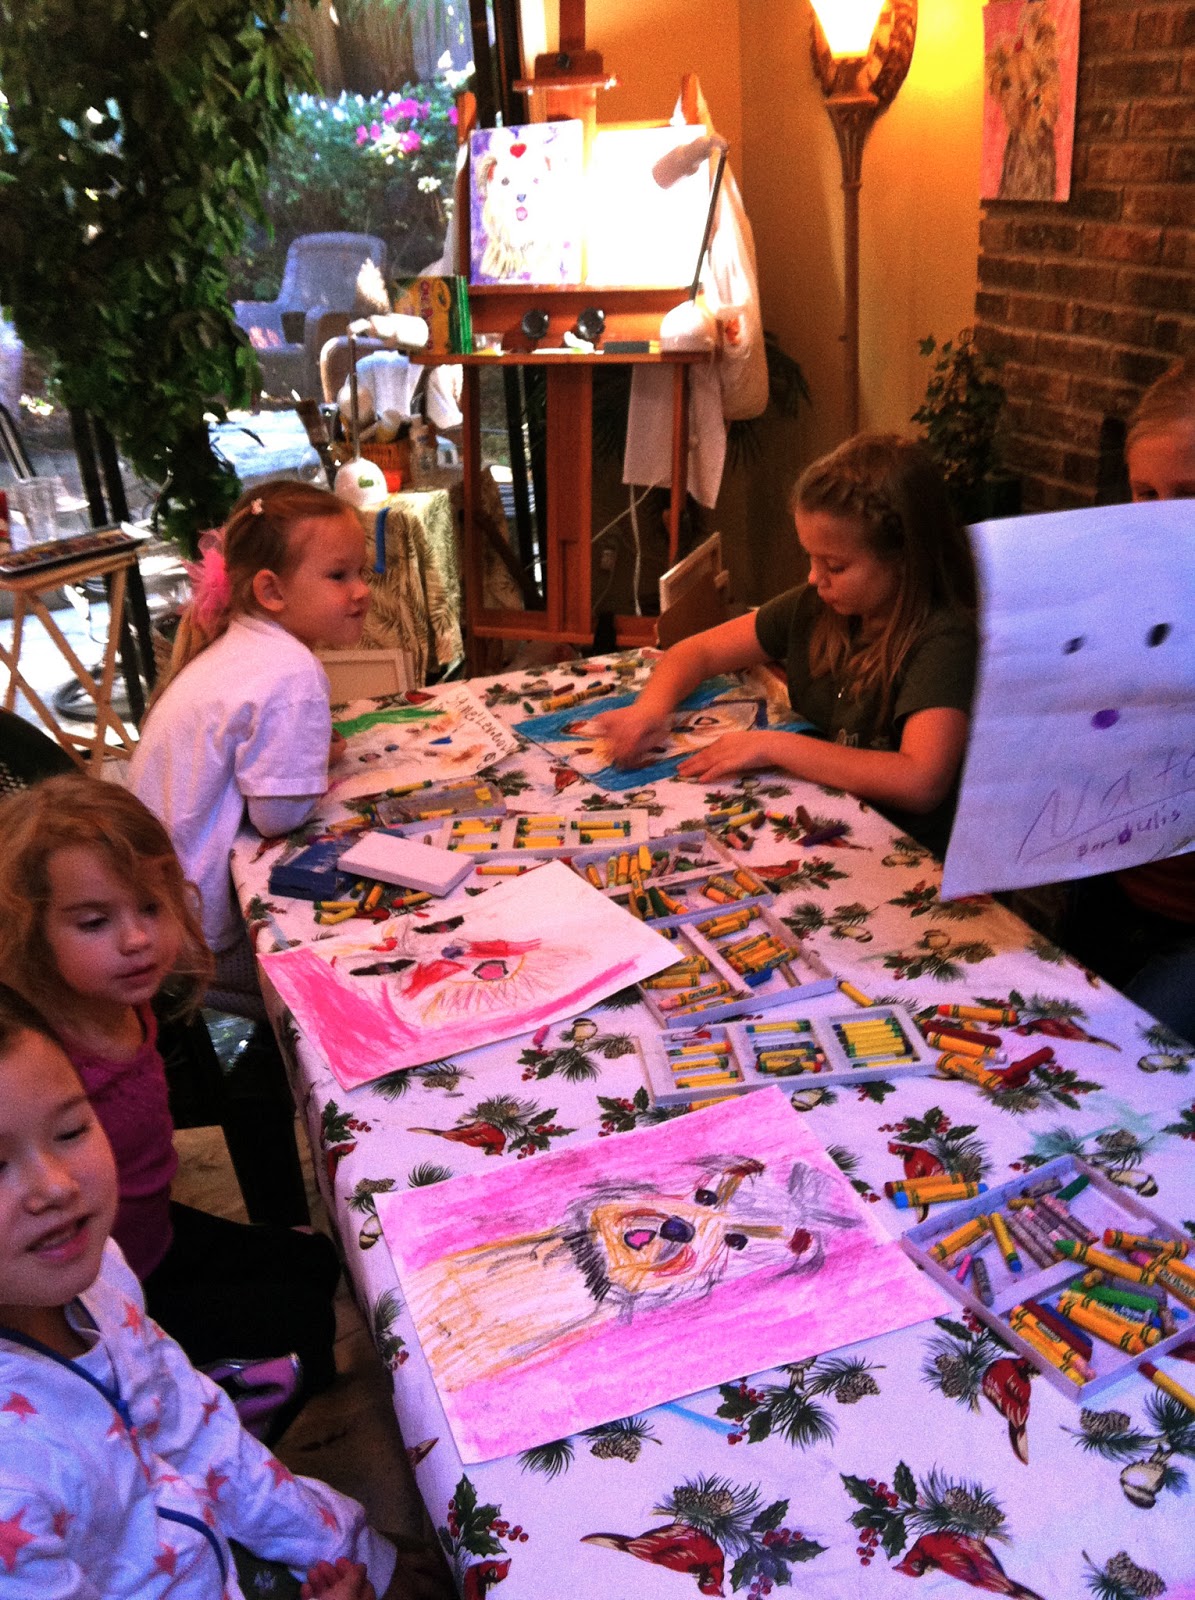
Let's look at our little artists hard at work...
1.  First draw an eyes and nose with a purple/violet oil pastel...
2.  Then color it in with the same purple.  Next outline the eyes in black, making them a little pointy on the sides instead of all round.  Put a black pupil in the middle.  

3.  Next, make an orange-brown(otherwise known as burnt sienna) line to the left of the pupil if you like to give your dog brown eyes.
4.  Make a little blue "smudge" line to the right of the pupil. This little bit of blue will make the dog's eyes look like they are shining!
5.  Now we are going to put a little of that blue on the top part of that nose circle as well so his nose looks nice and wet and shiny too!  
6.  Next, add a white spot to the eye for highlight.  Then we'll a little white on the nose to lighten up the purple and define the nostrils by making a "C on the right side of the nose and a backwards "C" on the left side!  
Your eyes and nose are done! 
7.  Next, add a mouth.  It can be a straight line or an upside down "V" with a large "U" under it to make an open mouth! 
8.  Finally, add grey fur around the eyes and mouth.  Now we will keep adding fur with fun little line strokes in all kinds of warm colors (like gold, brown, orange-brown) till your dog's face is all fluffy!  Remember to add the fur strokes in the direction the fur grows!  

A bright background color of your choice will fill your page and set off your doggie.

Look at our little artists final products.  These students range in age from 4 to 6:


Even the littlest ones can enjoy this project and feel successful in their drawings!  

Here are some samples...

Have fun!
  Love and blessings,


Laura Bird Miller

Artist/Art Instructor
www.laurabirdart.com

Labels: , ,

Feb 12, 2013

"My Heart is Like a Zoo" Craft

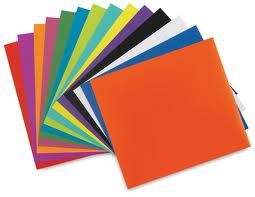
All you need is some colored paper, glue, scissors, and wriggly eyes!

What a fun activity for children - anytime!  This activity is based on last Friday's Fireflies Book Review, My Heart is Like a Zoo.   

First we went to the Dollar Store and found this set of six heart shapes - yep, for just a $1.    


We used the shapes to trace several different sized hearts on various colored sheets of card stock purchased from our local Michael's.    
I was excited to be able to cut out various shades of some colors - because I'd rather give children three shades of yellow to work with, instead of just "yellow".   But that's just me.  (and why I love the Pantone Colors book for children - see REVIEW here. 

After reading our CLIP pick book for February, My Heart is Like a Zoo, give your child the palette of heart shapes & colors, some wiggly eyes and let them create.    

Mount on a sheet of black or white card stock and display for all to see!    
A few more details and our creation will be complete.  Cute, isn't it?   

Encourage original animal creations, or allow children to replicate an animal from the book. It doesn't matter as long as you are having fun creating together!

Enjoy!


Deni Corbett
Subscribe in a reader

Labels:

Jan 14, 2013

Personal Snow Globes


Personalized Snow Globes!
There's nothing like a snow globe to thrill young minds.  It's like magic!  Shake it up and the swirling snow flies all around.  Especially fun is to have a photo of yourself in the scene as if you were there!  This snow globe project was inspired by Sarah Jones and Kate Wells at Our Best Bites.  We included a photo of each child right in the globe to personalize the experience.  Above is one of my 8 students that participated in a January art workshop for 6-9 year olds, with her finished snow globe.  


We used Mason (canning) jars (which you can buy at any grocery store or Walmart) because I wanted all the jars to be the same size.  You could use glass jars from your recycle bin but I did not have enough of the same-size recycled jars for each of the 8 students.  The Mason jars were hard to see through because of the pattern on the glass.  I would recommend using recycled jars if you can gather enough for however many children you have. 


You may be wondering if a photo would hold up in water.  Good news!  If they are laminated well, they actually stand up for quite some time in water!

Here's how we made them.

1.  Take a photo of the child pretending to be standing in snow.  I asked each child, "What would you do if all of a sudden it started snowing?" 

2.  Print the photo on 4 X 6 photo paper.  Trim around the shape.

3.  Laminate.  Trim again around the shape.

4.  Use permanent glue dots (easy for a group of young students to use themselves) or hot -glue (if your student is younger and you wish to do the gluing.) You will want to glue the photo to a popsicle stick and then to the bottom of the jar lid.  Then add any miniature "props" you want - something you would also find in a snowy scene: a piece of a pine tree, a penguin, a red bird, a sled...


We made sure the laminated photo would fit into the jar.

Finally we added fake snow (we used Buffalo Snow brand from Michael's.  See photos below.)  Then we filled the jar with water.  Instead of Buffalo Snow, you could use glitter.  Slowly, we lowered the lid with photo and props into the water and tightly screwed on the lid.

Swirling snow and the pattern of the Mason jar made it more challenging to see inside the globe, but as the snow started to settle, there, peaking out of the glass was our little student!  Surprise!


Success!  Our snow globes were a big hit!  The children loved having their own photo in their snow globe.  What fun!

Have a blast making your own personalized snow globes!  Send us pictures of your finished globes so we can see them!

And don't forget to sign up to receive notice when the free download of "S is for Snow" is available!  

Love and blessings,
Laura
Laura Bird Miller, Artist/Art Instructor
http://www.laurabirdmiller.com


Labels: ,

Jan 8, 2013

Puffy Paint Snowmen

What about making some homemade puffy paint to continue our Fireflies' snow theme?  I wanted 3D snow for my kids to paint with - and I made it!  I could not believe how easy this was - promise (read on).   I was actually on my way out the door, when I decided to make my paint-snow and the project took all of 10 minutes from beginning to end (with no child involvement, however...).
I gathered my materials.  The recipe calls for equal parts flour, salt and water.
Easy - three ingredients that this non Julia Child has on hand!  I started with 2 T of each and came up with  a smooth runny paste (aka puffy paint).  Since I was going for snow paint, I didn't add any food coloring, but you certainly could.  Wonder how glitter would have responded to this mixture?  Does it microwave?
So far so good...  Next I tried a small circle on a piece of cardboard I had nearby, and microwaved it for 30 secs.   I was so surprised when I removed my test painting from the microwave.  It was dry and puffy!  Oh me of little faith.  Surely it couldn't be this easy.
I was intrigued and decided to go for the snowman.  I used a piece of blue card stock and painted my snowman - quickly. (Remember, I was on my way out the door...)
It took longer in the microwave - about three minutes.  Just make sure the middle is puffy and dry.  You can watch it dry from the outside in.   You can see how the edges of the paper curled up a bit.  Though not a deal breaker - If you have cardboard or foam board, use that, and have your child paint a background scene for their snowman.

Below is my finished product awaiting some painted button eyes, a corncob nose and an old silk hat.   But that will have to wait for when my little ones come to visit.  Oh, how they will love to paint on something other than flat paper AND see their puffy creation come to life!   Perhaps we'll glue on some left over buttons from our last project...

NOTE:  The snowman's head was "cooked" completely - I rushed his body. Probably should have left it in a bit longer.

A perfect impromptu project to do at home if you have flour, salt, and water!
Deni Corbett

Don't forget to save these masterpiece creations
for your Fireflies Presents...
"S is for SNOW"  [Coming soon]


Find a copy of Lois Ehlert's book, Snowballs to inspire the budding creative in your home.  Your child will enjoy poring over the illustrations and identifying the objects selected to adorn Ehlert's snow family!


Labels: ,

Jan 7, 2013

Create a Button Snowflake


This project begins with my mom's old sewing box.   

Even at 96 years old, Mom was sewing on buttons and hemming drapes that were just a bit too long.   "I think this blouse would look better with short sleeves." she said as she examined the blouse that her then 91 year old sister had sent her.  Mom was all about repurposing.  She was "green" before her time.   And she saved buttons - oh, did she ever save buttons.  I sometimes worried that she would actually remove the buttons off of garments before donating them to Goodwill.   I remember our extra large mason jar full of buttons - so that we could add a missing button to dad's milk man shirts at a moment's notice - buttons of all sizes and shapes.  Read more...

I haven't thought about those buttons for years, until last week when my daughter and I were looking for a sewing needle and the only place I knew that had a chance of having one was... mom's old sewing box.  We did find a needle and that's when I saw all the buttons.


I remembered an ornament a friend of ours had created this year for their family Christmas tree.  I thought it might be fun to recreate the ornament using Mom's recently discovered buttons for our January Fireflies' theme - SNOW! (Even though the Christmas tree is getting ready to be put away.)


Materials:

  • craft sticks
  • buttons
  • hot glue gun or thick tacky glue (for younger crafters)
  • white paint 
  • ribbon for hangin' or a dowel for stickin'

1.  Glue the four craft sticks together.

2.  If you paint your craft sticks white, you won't have to worry about seeing the sticks between your buttons.


 3.  The finished product.   I love the various shades created by using Mom's old buttons.   All that is left is gluing it to a dowel or ribbon for use as a plant or window ornament.


This is a fun and easy project to do with young children.  It will take extra time when using tacky glue instead of hot glue gun.   Why not make a few, put them in some purchased house plants, and deliver with your children to a local nursing home or hospital?


Mary Byrne Kline [our Fireflies blog book reviewer and the author of "Reflections] has the best Grandma-name ever:  Button!  I'll let her share in a future post, how that precious name was given to her, but I've always thought it was the best name ever!  This snowflake creation is for "Button" Byrne Kline and for the woman responsible for so many rich family memories in my life - the button-saver, my Mom.
Deni Corbett


Labels: , ,

Dec 12, 2012

Humphrey's Blanket Ornament - Mini Monets Create!

Mini Monets Paint Humphrey's Blanket Sculptures

After reading the absolutely adorable book Humphrey's First Christmas by Carol Heyer, the Mini Monets [my First Fridays' Art Workshop students] created Humphrey's most prized possession...  his blanket! And this is not just any ordinary blanket - this is a blanket fit for a King!   As we read about this heart-warming camel with his silly grin and his schemes to obtain a new carpet blanket, the students discussed how they would feel, meeting baby Jesus for the first time.  


 Would they want to give him their most prized possession? What would that be?
Did they have a blanket that brings them comfort and if so, what does it look like? 
What would they feel if they were Humphrey?.
What gift could he/they possibly give to the ONE who truly is:

"Beloved
Most Beauteous
And Exalted King of All.."


Inspired by Humphrey's gift to baby Jesus and using my favorite cornstarch-based homemade clay recipe (see below,) the students, ages 5-9, first sculpted a "blanket".  

The reason I like the cornstarch over the salt dough recipes is because it dries hard, smooth, and white.  That doesn't mean it won't crack or have a problem with breaking.  You still have to be careful with the finished product.  With care, however, it should last for years.


We baked the "blankets" in the oven at 250 degrees for about 20 minutes.  Usually we would air dry overnight, but since this was only a one-day workshop, we needed to get it done within a few hours!  The cornstarch clay baked up nicely and after 10 minutes of cooling we proceeded to paint the dried clay.  

Look at the sampling of Humphrey's blankets!
Molding and shaping simple shapes like the "blanket" and then painting them, was easy to do and so much fun.    From the child who worked diligently to add fringes and details to their blankets, to the one who just plopped an overly-kneaded shape on the baking tray, this activity was enjoyed by all!  Notice one of the students in the larger photo even added baby Jesus laying on the blanket she created.  

Our students shared laughs, love and empathy with Humphrey while making a connection to the birth of Christ and the first Christmas through this loveable camel and delightful story of Humphrey's First Christmas  by Carol Heyer.


Corn Starch Clay Recipe


Materials needed:
1 cup cornstarch
2 cups baking soda
1 1/4 cups water


Directions:
  1. Combine ingredients in large sauce pan and stir until dough is lumpy and thick and can barely be stirred.
  2. Dump onto parchment paper or flat surface to cool for about 8-10 minutes.
  3. Knead until smooth once dough has cooled.  Keep in a ziplock bag until ready to use.
  4. Paint with watercolors, temperas, or acrylics and seal.  I have used all of these medium with this clay with good results.  I use Americana brand Triple Thick brilliant brush-on gloss glaze to seal the clay for a near kiln-fired shiny glaze appearance.
  5. Hot glue a jump ring to the back and attach a hook or a pretty ribbon to hang Humphrey's Blanket from your tree.
For busy folks who do not wish to take the time to make this clay, Crayola Model Magic will work, but it is more expensive.  Fimo and Sculpy brands are also great and have more weight to them, but not practical cost-wise for large groups. I have quadrupled this batch for 60 students in the past, so one batch would be plenty to make 15 blanket ornaments or serve up to 15 students very nicely.   

Please EMAIL us pictures of your "Humphrey's Blanket"!   Also, consider presenting blanket ornaments to those who attend your Fireflies Presents "C is for Christmas"!  CLICK HERE for more information.

Have a blessed Christmas, and may you enjoy the time spent creating and connecting with your children! 

Blessings,

Laura Bird Miller
Artist/Art Instructor


Mini Monets Monthly Art Workshops
Location: Longwood, FL

laurabirdmiller@gmail.com
www.laurabirdmiller.com


Labels: ,