Fireflies         

May 21, 2013

The Life Cycle of Pasta?

I want to share an idea from an amazing preschool teacher, Danielle Witherington from Lexington, KY.  I believe the best early childhood teachers come from an art background.  Why?  Because of the developmental growth and personal confidence that results from exposing young children to varied art experiences.  And that's one of the reasons I think Mrs. Witherington is such a wonderful teacher/encourager of young children... because of her art background.

That perspective of art as it relates to childhood development is why I have asked Laura Bird Miller to share art masterpieces with Fireflies' readers each month and Rachel to share simple art projects you can easily experience as a family.

OK, I know a butterfly is not a bird (even though they do have wings!) and does not actually fit into this month's theme.. but I wanted to post the project Mrs. Witherington's shared with her 4 & 5 year olds this week.

BTW - check out our May 2012 posts.  Theme: Butterflies!  My favorite butterfly book?  

A Butterfly is Patient by Dianna Hutts Aston

Read Mary's REVIEW.


Shared by Danielle Witherington,
Lexington Latin School  -  Lexington, KY
Is this great or what?    Thanks so much for allowing us to share this idea with our readers, Mrs. Witherington!  I just love it.

Deni Corbett


Labels:

Feb 20, 2013

Let's Draw a Dog! ~ Masterpiece Response

Most children love animals and man's best friend is the perfect animal for little ones to practice creating for our February Fireflies theme: Hearts & Love!   

Here is another little dog also by Manet 


"Head of Dog - Bob."
"Head of Dog - Bob"
Artist:  Manet

Manet was a painter during the Impressionistic period in France.  His friend was Monet.  A lot of people get Monet and Manet confused.  Claude Monet was known the father of Impressionism that began with his painting "Impression, Sunrise."  

Manet painted during that time period and was inspired by the Impressionists, but his style wasn't complete Impressionistic.


Let's draw a simple dog - step by step!  
You will need a box of oil pastels, a piece of white paper and a willing heart!
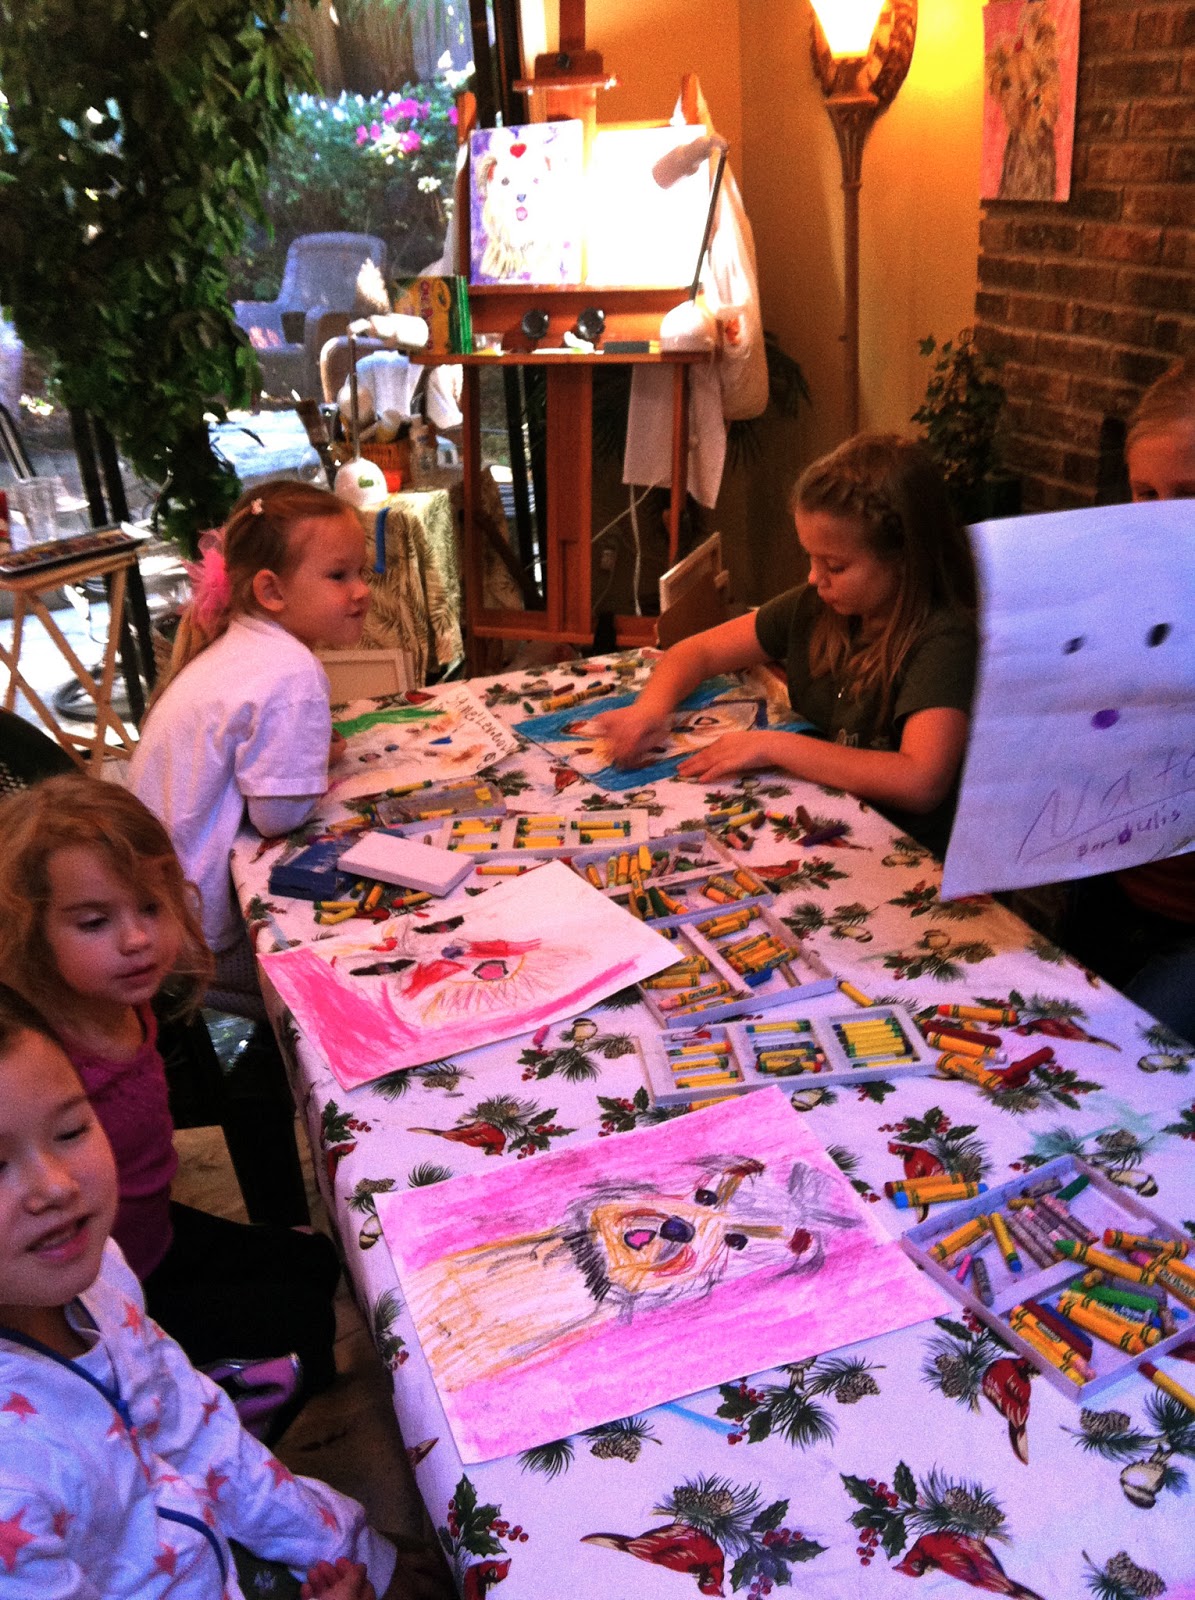
Let's look at our little artists hard at work...

1.  First draw an eyes and nose with a purple/violet oil pastel...
2.  Then color it in with the same purple.  Next outline the eyes in black, making them a little pointy on the sides instead of all round.  Put a black pupil in the middle.  

3.  Next, make an orange-brown(otherwise known as burnt sienna) line to the left of the pupil if you like to give your dog brown eyes.
4.  Make a little blue "smudge" line to the right of the pupil. This little bit of blue will make the dog's eyes look like they are shining!
5.  Now we are going to put a little of that blue on the top part of that nose circle as well so his nose looks nice and wet and shiny too!  
6.  Next, add a white spot to the eye for highlight.  Then we'll a little white on the nose to lighten up the purple and define the nostrils by making a "C on the right side of the nose and a backwards "C" on the left side!  
Your eyes and nose are done! 
7.  Next, add a mouth.  It can be a straight line or an upside down "V" with a large "U" under it to make an open mouth! 
8.  Finally, add grey fur around the eyes and mouth.  Now we will keep adding fur with fun little line strokes in all kinds of warm colors (like gold, brown, orange-brown) till your dog's face is all fluffy!  Remember to add the fur strokes in the direction the fur grows!  

A bright background color of your choice will fill your page and set off your doggie.

Look at our little artists final products.  These students range in age from 4 to 6:


Even the littlest ones can enjoy this project and feel successful in their drawings!  

Here are some samples...

Have fun!
  Love and blessings,


Laura Bird Miller

Artist/Art Instructor
www.laurabirdart.com

Labels: , ,

Jan 7, 2013

Create a Button Snowflake


This project begins with my mom's old sewing box.   

Even at 96 years old, Mom was sewing on buttons and hemming drapes that were just a bit too long.   "I think this blouse would look better with short sleeves." she said as she examined the blouse that her then 91 year old sister had sent her.  Mom was all about repurposing.  She was "green" before her time.   And she saved buttons - oh, did she ever save buttons.  I sometimes worried that she would actually remove the buttons off of garments before donating them to Goodwill.   I remember our extra large mason jar full of buttons - so that we could add a missing button to dad's milk man shirts at a moment's notice - buttons of all sizes and shapes.  Read more...

I haven't thought about those buttons for years, until last week when my daughter and I were looking for a sewing needle and the only place I knew that had a chance of having one was... mom's old sewing box.  We did find a needle and that's when I saw all the buttons.


I remembered an ornament a friend of ours had created this year for their family Christmas tree.  I thought it might be fun to recreate the ornament using Mom's recently discovered buttons for our January Fireflies' theme - SNOW! (Even though the Christmas tree is getting ready to be put away.)


Materials:

  • craft sticks
  • buttons
  • hot glue gun or thick tacky glue (for younger crafters)
  • white paint 
  • ribbon for hangin' or a dowel for stickin'

1.  Glue the four craft sticks together.

2.  If you paint your craft sticks white, you won't have to worry about seeing the sticks between your buttons.


 3.  The finished product.   I love the various shades created by using Mom's old buttons.   All that is left is gluing it to a dowel or ribbon for use as a plant or window ornament.


This is a fun and easy project to do with young children.  It will take extra time when using tacky glue instead of hot glue gun.   Why not make a few, put them in some purchased house plants, and deliver with your children to a local nursing home or hospital?


Mary Byrne Kline [our Fireflies blog book reviewer and the author of "Reflections] has the best Grandma-name ever:  Button!  I'll let her share in a future post, how that precious name was given to her, but I've always thought it was the best name ever!  This snowflake creation is for "Button" Byrne Kline and for the woman responsible for so many rich family memories in my life - the button-saver, my Mom.
Deni Corbett


Labels: , ,

May 30, 2012

Play Dough: Colors of the Rainbow!


CLICK HERE for a great post from the blog, Musings from a Stay at Home Mom.  You will find detailed pictures posted to go along with the playdough recipe - for those of you who are visual learners like me.


The recipe in the blog listed above is one that you have to cook.  Below you will find a recipe I have used, for uncooked play dough.  I have made both, and both are easy, I promise.   


I had great fun making playdough with my 3 year old and 2 year old grandsons creating playdough treasures together: letters and a fierce pirate ship!  (pics below)

Uncooked Play Dough
2 cups of plain flour
4 tablespoons of 'cream of tartar'
2 tablespoons of cooking oil
1 cup of salt
2 cups of boiling water
food coloring


Place everything in a large bowl and mix.   You might think it won't blend thoroughly at first, but keep mixing. Once it comes together, place on a flat surface and begin kneading until it has a smooth texture.


Along with food coloring, try adding kool-aid for colors.   Not only does it create wonderful colors; it smells great too.   Peppermint oil also has a great smell and causes the playdough to last even longer.

Adding color to our cooked playdough.
We added raspberry kool-aid to this batch! 
Rolling and cutting playdough kept him
happily occupied for over an hour!   
Raspberry kool-aid colored play dough with glitter!
We bought plastic A-Z cookie cutters, cut out
letters, and practiced "reading".
Getting ready to build our pirate ship!


Labels: ,